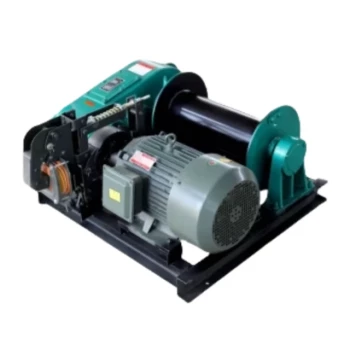
The key steps for installing a hoist winch involve preparing a solid foundation, securely mounting the unit, correctly rigging the wire rope, and conducting a series of rigorous tests before it is put into service. This process moves from large-scale structural work to fine-tuned mechanical and electrical adjustments, ensuring both safety and operational reliability.
A successful hoist winch installation is not merely a mechanical task; it is a systematic process where pre-installation preparation and post-installation commissioning are just as crucial as the physical mounting itself.
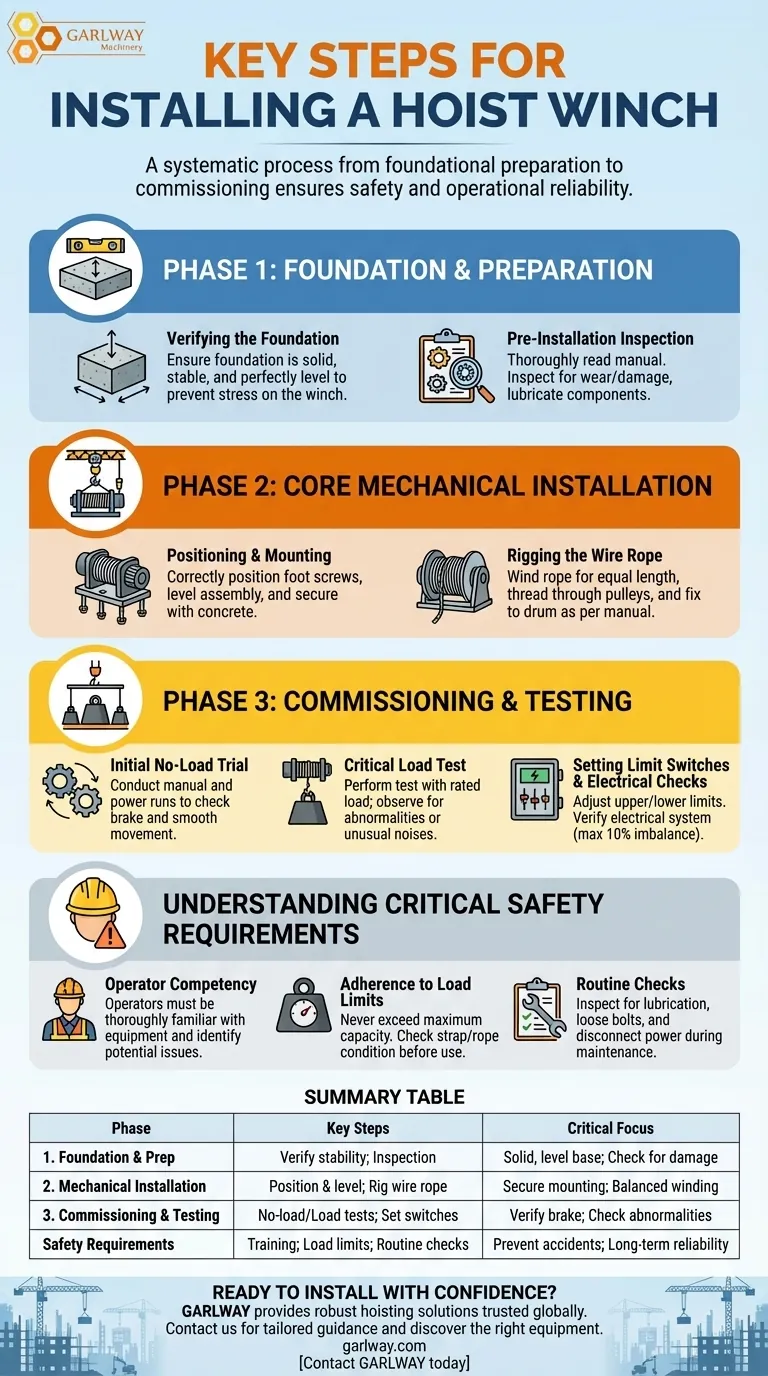
Phase 1: Foundation and Preparation
Before the winch is ever lifted into place, foundational work and equipment checks are paramount. Skipping these steps is a common cause of premature failure and safety incidents.
Verifying the Foundation
The entire load will be transferred through the winch to its foundation. Therefore, you must ensure the foundation is solid, stable, and perfectly level.
Any weakness or unevenness in the foundation will introduce stress into the winch frame, leading to operational problems and potential structural failure.
Pre-Installation Inspection
Before beginning, thoroughly read the manufacturer's manual. Every model has specific requirements that must be followed.
Inspect the hoist, chain, and all components for any wear or damage that may have occurred during shipping. It is also wise to lubricate all chain links and moving parts as specified by the manufacturer.
Phase 2: Core Mechanical Installation
This phase involves the physical mounting and rigging of the winch system. Precision is critical to ensure smooth operation.
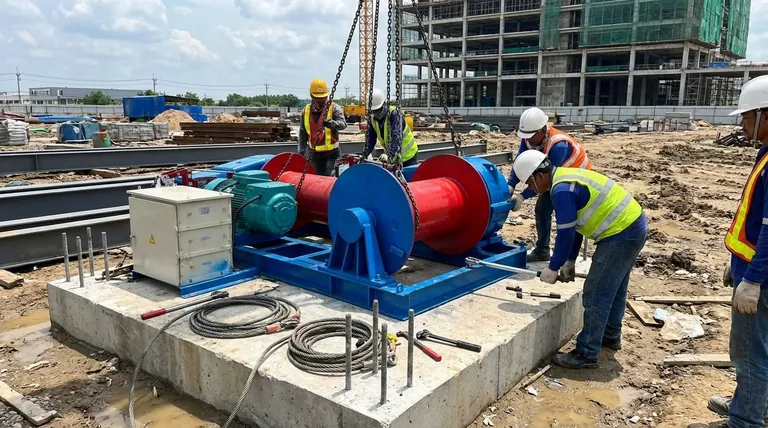
Positioning and Mounting the Winch
First, position the foot screws correctly on the prepared foundation. Carefully lift the winch and lower it into its final place.
Before securing it, level the winch assembly precisely. Once level, pour concrete to permanently and securely fix the winch in place.
Rigging the Wire Rope
The wire rope must be wound correctly to ensure balanced and safe lifting.
Start by winding the rope around the balance wheel, ensuring equal lengths of rope extend from both sides.
Next, carefully thread the rope through the movable pulley group. Finally, fix the end of the wire rope securely to the drum, following the manufacturer's specific instructions for termination.
Phase 3: Commissioning and Testing
After the mechanical installation is complete, the winch must be systematically tested and calibrated before it can be certified for use.
Initial No-Load Trial Run
First, conduct a no-load test. Manually rotate the gears to feel for smooth movement and to confirm the brake is functioning properly.
Then, under power, run the screw through two full strokes (up and down). Listen carefully for any abnormal sounds and verify that the installation meets all technical requirements.
The Critical Load Test
Once the no-load test is successful, proceed to a load test using the winch's rated load.
Observe the operation of the screw and gate closely. Check for any abnormalities, strain, or unusual noises that would indicate a problem with the installation.
Setting Limit Switches and Electrical Checks
Properly adjust the upper and lower limit positions. The switches must be set to stop the motor precisely when the gate is fully open or fully closed.
You should also verify the electrical system. Under no-load conditions, the three-phase current imbalance should not exceed 10%.
Understanding Critical Safety Requirements
A correct installation can be undone by poor operational practices. These principles must be ingrained in your process from day one.
Operator Competency
The designated operator must be thoroughly familiar with the winch's structure, performance, and operation methods. They must possess sufficient mechanical knowledge to identify potential issues.
Adherence to Load Limits
Never use the winch to lift a load greater than the maximum capacity specified in the manual. Check that the strap or wire rope is not weak, frayed, or kinked before every use.
Routine Checks
Before every operation, the operator must inspect the winch for good lubrication and any loose bolts. During maintenance, the power must be disconnected and any load must be removed from the hoist.
Applying This to Your Project
Your primary goal will dictate where you focus the most attention during the installation process.
- If your primary focus is maximum safety and long-term reliability: Pay meticulous attention to the foundation preparation and the multi-stage commissioning tests. Never sign off on an installation until both no-load and full-rated-load tests are passed without issue.
- If your primary focus is operational efficiency and uptime: Ensure the operator is expertly trained and that the limit switches are set with absolute precision. Proper limits prevent equipment damage and reduce downtime caused by operational errors.
A methodical and thorough installation process is the foundation for a safe and effective lifting system.
Summary Table:
| Phase | Key Steps | Critical Focus |
|---|---|---|
| 1. Foundation & Prep | Verify foundation stability; Pre-installation inspection | Solid, level base; Check for shipping damage |
| 2. Mechanical Installation | Precisely position and level winch; Correctly rig wire rope | Secure mounting; Balanced rope winding |
| 3. Commissioning & Testing | No-load trial; Rated load test; Set limit switches | Verify brake function; Check for abnormalities |
| Safety Requirements | Operator training; Adherence to load limits; Routine checks | Prevent accidents; Ensure long-term reliability |
Ready to Install Your Hoist Winch with Confidence?
GARLWAY specializes in providing robust construction machinery, including durable winches, concrete mixers, and batching plants, trusted by construction companies and contractors globally.
Let us help you ensure a safe and efficient installation. Our experts can provide guidance tailored to your specific project needs, helping you maximize uptime and operational safety.
Contact GARLWAY today to discuss your hoisting requirements and discover the right equipment for your job!
Visual Guide
Related Products
- Electric Hoist Winch Boat Anchor Windlass for Marine Applications
- Electric and Hydraulic Winch for Heavy Duty Applications
- Hydraulic Winding Engine Harbor Freight Winch
- Portable Small Trailer Winch
- Warn Winch Windlass Boat Trailer Winch
People Also Ask
- What are the advantages of installing an electric anchor winch on a boat? Boost Safety & Ease for Boaters
- How does a boat anchor winch work? A Guide to Reliable Anchor Handling
- What are the differences in lifting height between single-drum and double-drum electric hoists? Choose the Right Hoist for Your Project's Height Needs
- What are the main benefits of a boat anchor winch? Boost Safety & Efficiency for Your Vessel
- What are the operational differences between electric hoists and winches? A Guide to Safe Lifting vs. Pulling