To properly debug a hoist winch after installation, you must perform a structured, multi-stage process that validates its electrical, mechanical, and safety systems. This begins with a no-load test to check for current imbalance and abnormal sounds, followed by the critical calibration of the upper and lower travel limit switches, and concludes with a series of controlled load tests to verify performance under real-world conditions.
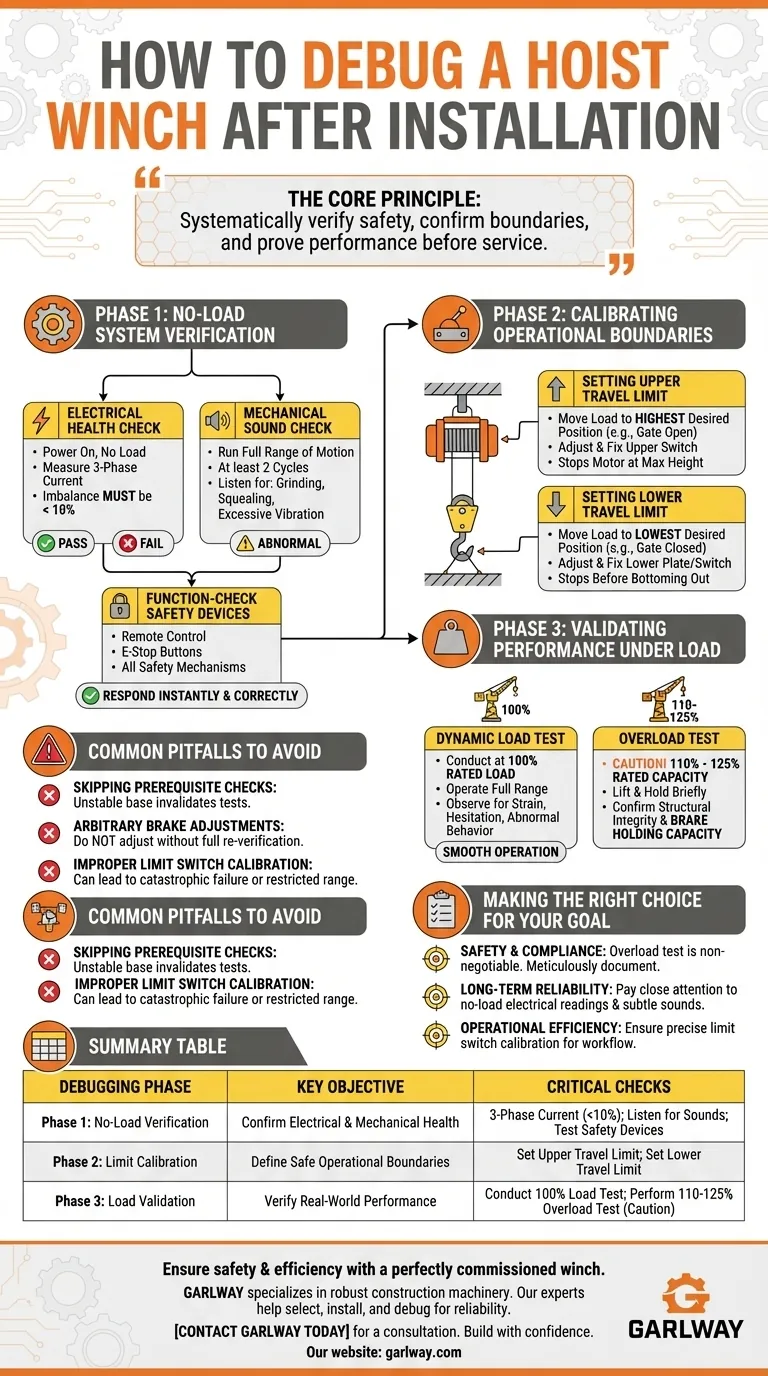
The core principle of post-installation debugging is not just to see if the winch works, but to systematically verify its safety, confirm its operational boundaries, and prove its performance under its specified load before it is put into service.
Phase 1: No-Load System Verification
Before applying any load, you must confirm the winch's basic electrical and mechanical health. This foundational check prevents damage and ensures the system is ready for more demanding tests.
The Electrical Health Check
Your first step is to verify the motor's electrical stability. Power on the winch without any load attached.
Measure the current across all three phases. The three-phase current imbalance must not exceed 10%. A higher imbalance indicates a potential wiring or motor issue that must be resolved immediately.
The Mechanical Sound Check
Next, run the winch through its full range of motion. Operate the screw or drum through at least two full travel cycles.
Listen carefully for any abnormal sounds, such as grinding, squealing, or excessive vibration. These can indicate misalignments, inadequate lubrication, or installation problems.
Function-Check Safety Devices
During the no-load run, test all safety features. This includes the remote control functions, emergency stop buttons, and any other integrated safety mechanisms. Ensure they respond instantly and correctly.
Phase 2: Calibrating Operational Boundaries
With the basic system verified, you must now define the winch's safe working limits. This is done by setting the physical limit switches that prevent over-travel.
Setting the Upper Travel Limit
Move the gate or load to its highest desired position (e.g., gate fully open).
At this point, adjust and fix the upper limit switch so that it is activated. This action will automatically stop the motor when the load reaches this pre-set maximum height.
Setting the Lower Travel Limit
Move the gate or load to its lowest desired position (e.g., gate fully closed).
Adjust and fix the lower limit plate or switch to activate at this point. This ensures the winch stops before the load bottoms out or the cable becomes slack.
Phase 3: Validating Performance Under Load
Once the no-load tests and limit calibrations are complete, you must verify the winch's performance under its intended working conditions.
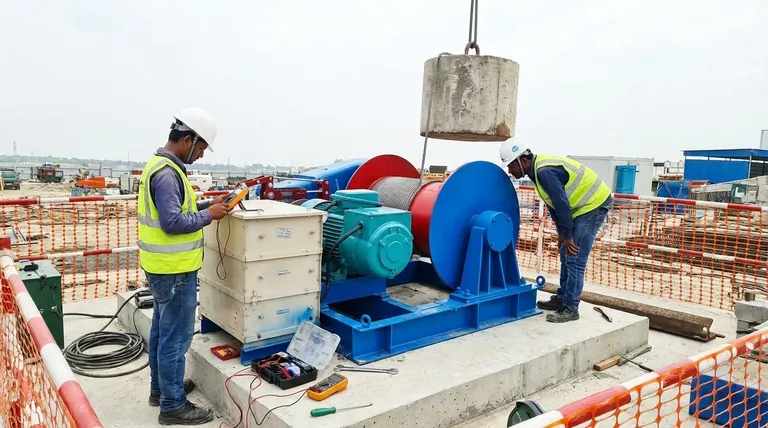
The Dynamic Load Test
Conduct a test at 100% of the winch's rated load.
Operate the winch through its full range of motion. Carefully observe the operation of the screw, drum, and gate, looking for any signs of strain, hesitation, or abnormal behavior. The system should operate smoothly and confidently.
The Overload Test
The overload test is a critical safety validation, typically performed once before the winch's first official use or after major repairs.
Gradually and carefully load the winch to 110% to 125% of its rated capacity. Lift and hold the load briefly to confirm the structural integrity and, most importantly, the brake's holding capacity. This test must be conducted with extreme caution.
Common Pitfalls to Avoid
Successfully debugging a winch means being aware of the risks involved. Missteps in this phase can compromise safety and lead to equipment failure.
Skipping Prerequisite Checks
Never proceed to load testing without first verifying the foundation. Ensure the winch is installed on a solid, level surface and is properly anchored according to manufacturer specifications. An unstable base will invalidate all subsequent tests.
The Risk of Arbitrary Brake Adjustments
The winch brake is a critical safety component factory-set for a reason. Do not adjust the brake arbitrarily.
If an adjustment is absolutely necessary, you must conduct a full series of lifting tests, including a dynamic and overload test, to re-verify its holding capacity.
Improper Limit Switch Calibration
Incorrectly set limit switches can lead to catastrophic failure. Setting them too far apart can cause the winch to damage itself or the attached equipment. Setting them too close will needlessly restrict its operational range. Precision is key.
Making the Right Choice for Your Goal
Finalize your commissioning process by focusing on the outcome that matters most for your application. Use these guidelines to prioritize your efforts.
- If your primary focus is safety and compliance: The overload test is non-negotiable. Meticulously document the results of every test phase for your records.
- If your primary focus is long-term reliability: Pay close attention to the no-load electrical readings and listen for any subtle mechanical noises that could indicate future problems.
- If your primary focus is operational efficiency: Ensure the upper and lower limit switches are calibrated with absolute precision to match the exact needs of your workflow.
By following this systematic debugging process, you transform a newly installed piece of equipment into a verified, safe, and reliable asset.
Summary Table:
| Debugging Phase | Key Objective | Critical Checks |
|---|---|---|
| Phase 1: No-Load Verification | Confirm electrical & mechanical health | - Check 3-phase current imbalance (<10%) |
- Listen for abnormal sounds
- Test all safety devices | | Phase 2: Limit Calibration | Define safe operational boundaries | - Set upper travel limit switch
- Set lower travel limit switch | | Phase 3: Load Validation | Verify real-world performance | - Conduct 100% rated load test
- Perform 110-125% overload test (with caution) |
Ensure your construction project's safety and efficiency with a perfectly commissioned winch.
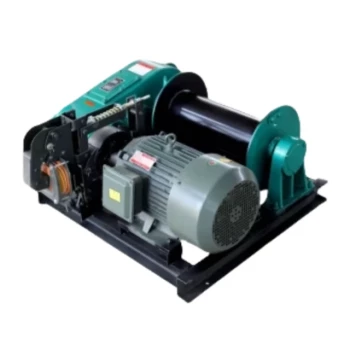
GARLWAY specializes in providing robust construction machinery, including durable hoist winches, concrete mixers, and batching plants, designed for the demanding needs of construction companies and contractors globally.
Our experts can help you select the right equipment and ensure it's installed and debugged correctly for maximum reliability. Contact GARLWAY today for a consultation and let us help you build with confidence.
Visual Guide
Related Products
- Electric Hoist Winch Boat Anchor Windlass for Marine Applications
- Electric and Hydraulic Winch for Heavy Duty Applications
- Hydraulic Winding Engine Harbor Freight Winch
- Portable Small Trailer Winch
- Warn Winch Windlass Boat Trailer Winch
People Also Ask
- How does a boat anchor winch work? A Guide to Reliable Anchor Handling
- What are the differences in lifting height between single-drum and double-drum electric hoists? Choose the Right Hoist for Your Project's Height Needs
- How does an electric anchor winch work? Power, Safety, and Reliable Operation Explained
- What are the key considerations for installing a windlass type anchor winch? Ensure a Flawless Gravity-Feed System
- What are the advantages of a windlass type anchor winch? Achieve Precise, Rapid Anchoring for Your Vessel