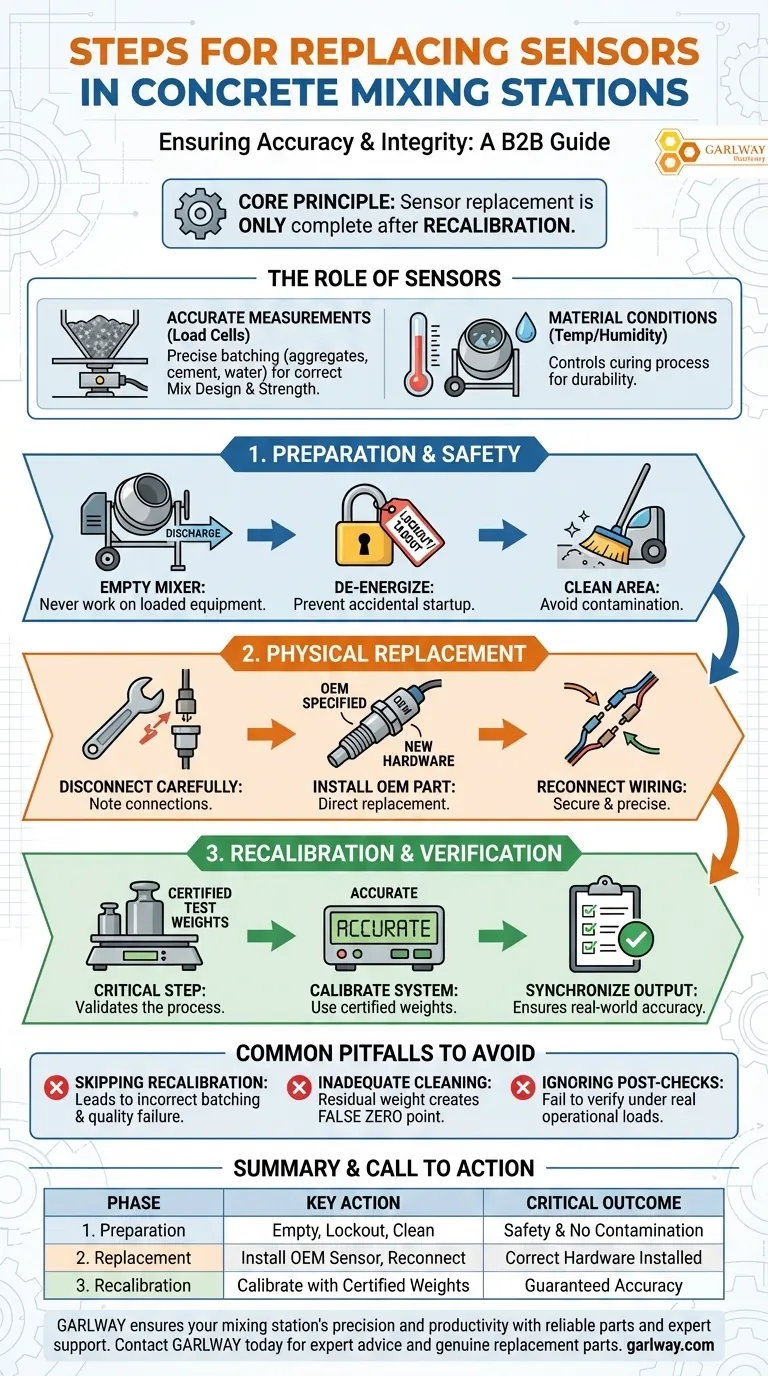
Replacing a sensor in a concrete mixing station involves three critical phases: preparing the equipment for safe access, performing the physical replacement, and conducting a meticulous recalibration. The most crucial step, which ensures the continued accuracy of your entire operation, is the post-replacement calibration of the associated scale or system.
The core principle is that a sensor replacement is not complete until the system has been recalibrated. Simply swapping the hardware without verifying its output against known standards will compromise the integrity of every batch of concrete produced afterward.
The Role of Sensors in Production Integrity
Sensors are the nervous system of a concrete mixing station. Their accuracy directly impacts the quality, consistency, and structural soundness of the final product.
Ensuring Accurate Measurements
The most common sensors are load cells or weight sensors. They are responsible for precisely measuring aggregates, cement, water, and admixtures.
An inaccurate weight sensor can lead to a flawed mix design, potentially compromising the concrete's strength and durability.
Controlling Material Conditions
Other vital sensors monitor temperature and humidity. These devices control the condition of raw materials and the mixing environment.
Proper temperature and moisture control are essential for managing the concrete's curing process and ensuring it meets engineering specifications.
A Methodical Guide to Sensor Replacement
A disciplined, step-by-step process prevents errors and guarantees a reliable outcome. Rushing any of these stages introduces significant risk.
Step 1: Preparation and Safety
Before any work begins, the equipment must be made safe. This is a non-negotiable first step.
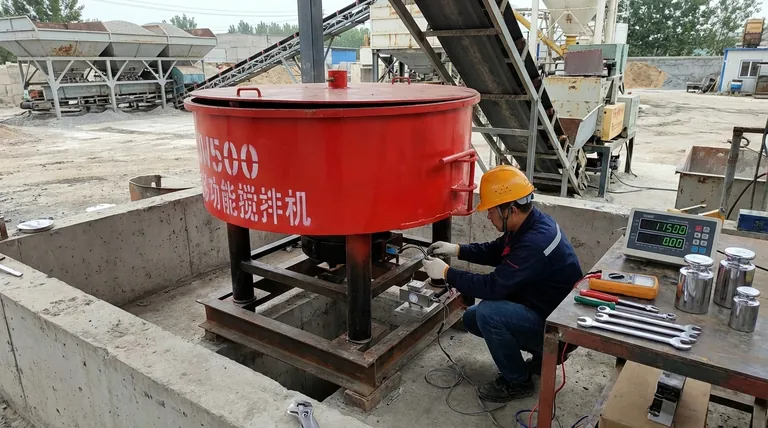
First, ensure all concrete is completely discharged from the mixer and associated hoppers. Never work on equipment that is loaded.
Implement standard lockout/tagout procedures to de-energize the equipment, preventing any accidental startup during the maintenance process.
Finally, clean the area around the sensor and the mixing site. This prevents debris from contaminating the new sensor or its connections.
Step 2: The Physical Replacement
This is the most straightforward mechanical step.
Carefully disconnect the wiring and mounting hardware of the faulty sensor. Take note of the connection points.
Install the new sensor, ensuring it is a direct, OEM-specified replacement. Secure all mounting hardware and reconnect the wiring precisely as the old unit was.
Step 3: Recalibration and Verification
This final phase is what validates the entire process. A new sensor is not functional until it is calibrated.
After installation, the scale or system must be recalibrated according to the manufacturer's procedure. This typically involves using certified test weights to teach the system what a known weight feels like.
This process synchronizes the new sensor's electronic output with a real-world physical value, ensuring every measurement it takes is accurate.
Common Pitfalls to Avoid
Mistakes during sensor replacement often stem from skipping procedural steps, leading to costly production errors.
The Risk of Skipping Recalibration
The single biggest mistake is assuming a new sensor is accurate out of the box. Manufacturing tolerances mean no two sensors are identical.
Failing to recalibrate will lead to incorrect batching, wasted materials, and producing concrete that fails quality control tests.
Inadequate Cleaning and Preparation
If the mixer and hoppers are not fully emptied, the residual weight will create a false "zero point" during calibration.
This error, known as a zero-offset, will make every subsequent measurement inaccurate, skewing all your batch weights.
Ignoring Post-Replacement Checks
After calibration, run a few test batches to verify that the system is performing as expected. Compare the material usage reported by the system with your inventory.
This final check confirms that the new sensor and its calibration are functioning correctly under real-world operational loads.
Ensuring a Successful Replacement
Your approach to sensor replacement should align with your primary operational goals: uptime, quality, and safety.
- If your primary focus is operational uptime: Schedule sensor replacement during planned downtime and keep pre-calibrated spare components on hand where possible.
- If your primary focus is quality assurance: Mandate and document a full recalibration with certified weights for every single sensor replacement, no exceptions.
- If your primary focus is team safety: Strictly enforce the "empty, clean, and de-energize" protocol before any technician begins work.
By treating sensor replacement as a precise procedure rather than a simple parts swap, you safeguard the integrity of your equipment and the quality of your product.
Summary Table:
| Phase | Key Action | Critical Outcome |
|---|---|---|
| 1. Preparation | Empty mixer, lockout/tagout, clean area | Ensures technician safety and prevents contamination |
| 2. Replacement | Install OEM-specified sensor, reconnect wiring | Correct hardware is physically installed |
| 3. Recalibration | Calibrate system with certified weights | Guarantees measurement accuracy for every batch |
Ensure your mixing station's precision and productivity. Replacing sensors correctly is critical for batch quality and avoiding costly errors. GARLWAY specializes in construction machinery, offering reliable concrete batching plants, mixers, and genuine parts for construction companies and contractors globally. Our experts can provide support and guidance to keep your operations running smoothly.
Contact GARLWAY today for expert advice and genuine replacement parts.
Visual Guide
Related Products
- HZS90 Large Multiquip Concrete Mixers for Construction
- Harbor Freight JS1500 On Site Concrete Mixing Volumetric Cement Mixer
- HZS180 Ready Mix Concrete Plant for Foundations with Sand and Cement
- Portable Electric Concrete Mixer Machine for Cement Mixing
- Hydraulic Concrete Mixer Machine Cement Mixing Equipment for Mixture Concrete
People Also Ask
- How should contractors choose the type of concrete mixer for a project? Match Mixer to Job for Optimal Quality & Efficiency
- What are the power source options for concrete mixers? Choose the Right Power for Your Job Site
- What are the types of concrete mixers used in batching plants? Choose the Right Mixer for Your Project
- What is the core component of a concrete batching plant? The Mixer Unit Defines Your Concrete Quality
- What are the main types of concrete mixers mentioned? Find the Perfect Mixer for Your Project


