At its core, the general approach to troubleshooting a concrete mixer is a three-step process: carefully observe and identify the specific fault, implement a logical solution based on that cause, and know when to escalate the issue to the manufacturer for expert assistance. The primary goal is to diagnose the problem accurately to minimize costly project delays.
The most effective troubleshooting strategy is not just about fixing what's broken; it's a systematic process of elimination that moves from the simplest potential causes to the most complex, always prioritizing safety and operational continuity.
A Systematic Troubleshooting Framework
A reactive, haphazard approach leads to wasted time and potential damage. A structured process ensures you cover all bases efficiently and safely before a minor issue becomes a major shutdown.
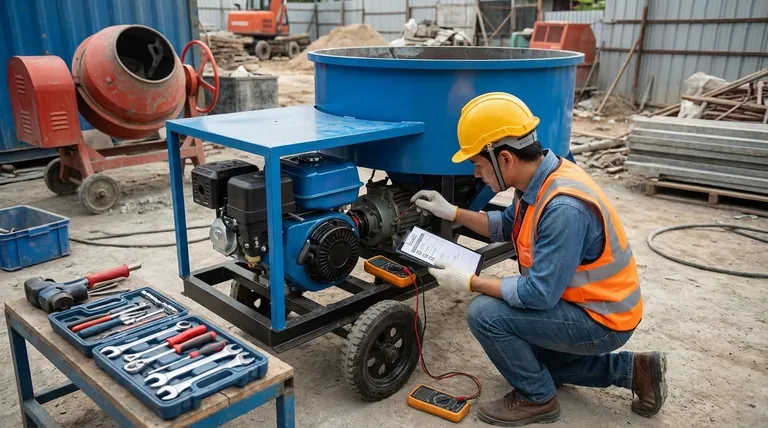
Step 1: Prioritize Safety and Observation
Before any physical inspection, ensure the mixer is completely powered down and de-energized. Use lock-out/tag-out procedures to prevent accidental startup.
Once the machine is safe, observe the symptoms. Is the motor failing to start? Is the drum not rotating? Are there unusual grinding or knocking sounds? Document exactly what is happening (or not happening).
Step 2: Check the Fundamentals
The most common faults are often the simplest to fix. Always begin by verifying the absolute basics, as this can save significant time.
Check the power source, fuel levels, circuit breakers, and emergency stop buttons. Ensure all safety guards and interlock switches are properly engaged, as a misaligned guard can prevent operation.
Step 3: Isolate the Problem Area
Based on your observations, narrow your focus to one of the mixer's core systems.
A failure to start points to an electrical or engine issue. A drum that won't turn despite the motor running suggests a mechanical or drive system problem (belts, gears, hydraulics).
Step 4: Evaluate the Output Quality
A key indicator of a mixer's health is the quality of the concrete it produces. This is a direct measure of its core function.
If the mixer seems to be running but the concrete is not uniform, it points to internal problems. You can assess this by measuring the homogeneity of the mix—analyzing how well coarse aggregates, fine aggregates, and cement paste are distributed. Poor homogeneity can indicate worn-out mixing blades, incorrect drum speed, or improper loading procedures.
Common Pitfalls and When to Escalate
Knowing the limits of on-site troubleshooting is critical for safety and preventing further damage to the equipment. The goal is to solve the problem, not create a larger one.
The Risk of a Quick Fix
Simply treating a symptom without understanding the root cause is a common mistake. For example, repeatedly replacing a blown fuse without investigating the underlying electrical short will only lead to more downtime and potential equipment failure.
Knowing Your Limits
While checking fluids, belts, and power sources is standard procedure, attempting complex engine repair or gearbox disassembly without proper training is unwise. This can void warranties and lead to unsafe operating conditions.
When to Call the Manufacturer
If the fundamental checks do not reveal the issue, or if the fault is with a complex component like the engine control unit or hydraulic pump, it is time to stop. Contacting the manufacturer's after-sales service brings in expert knowledge and ensures the repair is done correctly and safely.
Making the Right Call for Your Project
Your troubleshooting approach should be guided by your immediate operational goal.
- If your primary focus is minimizing immediate downtime: Always start with the fundamentals—power, fuel, and safety interlocks—as these are the most frequent and fastest issues to resolve.
- If your primary focus is ensuring concrete quality: Pay close attention to mix homogeneity. Inconsistent output is a clear sign of internal wear or operational error that must be addressed.
- If your primary focus is long-term equipment reliability: Do not settle for a temporary patch. If a problem reoccurs, escalate it to a professional technician to diagnose and fix the root cause permanently.
A disciplined troubleshooting process transforms unexpected breakdowns from project-stopping crises into manageable operational tasks.
Summary Table:
| Step | Action | Key Focus |
|---|---|---|
| 1 | Prioritize Safety & Observation | Power down, observe symptoms, document issues. |
| 2 | Check the Fundamentals | Verify power, fuel, safety guards, and interlocks. |
| 3 | Isolate the Problem Area | Identify if the issue is electrical, mechanical, or related to drive systems. |
| 4 | Evaluate Output Quality | Assess mix homogeneity to diagnose internal wear or operational errors. |
Keep your projects on schedule with reliable equipment from GARLWAY.
Our expertly engineered concrete mixers, winches, and batching plants are built for durability and ease of maintenance, minimizing unexpected downtime. If you're facing a complex issue or want to invest in machinery designed for simpler troubleshooting and long-term reliability, our team is here to help.
Contact GARLWAY's expert support team today for professional advice, genuine parts, and service to get your operation running smoothly again.
Visual Guide

Related Products
- Portable Concrete Mixer Machine Equipment for Mixing Concrete
- Construction Products Concrete Plant Machine Mixing Concrete Mixer
- Portable Electric Concrete Mixer Machine for Cement Mixing
- JZC400 Mobile Small Concrete Mixer Cement Mixer Machine
- Hydraulic Concrete Mixer Machine Cement Mixing Equipment for Mixture Concrete
People Also Ask
- What types of portable concrete mixers exist? Find the Perfect Mixer for Your Project
- How much concrete can you pour with a portable mixer? Find the Perfect Fit for Your Project
- What types of projects are portable concrete mixers suitable for? Ideal for DIY & Small-Scale Construction
- What are the advantages of a portable concrete mixer? Boost Efficiency & Save Costs on Small Jobs
- How much does a portable concrete mixer hold? A Guide to Choosing the Right Capacity


