To release a stuck clutch, you must carefully remove it from its shaft, clean the bonded surfaces, and apply fresh lubricant before reassembly. This typically occurs when a machine has been left unused, causing the clutch faces and shaft to seize together from corrosion or dried lubricant.
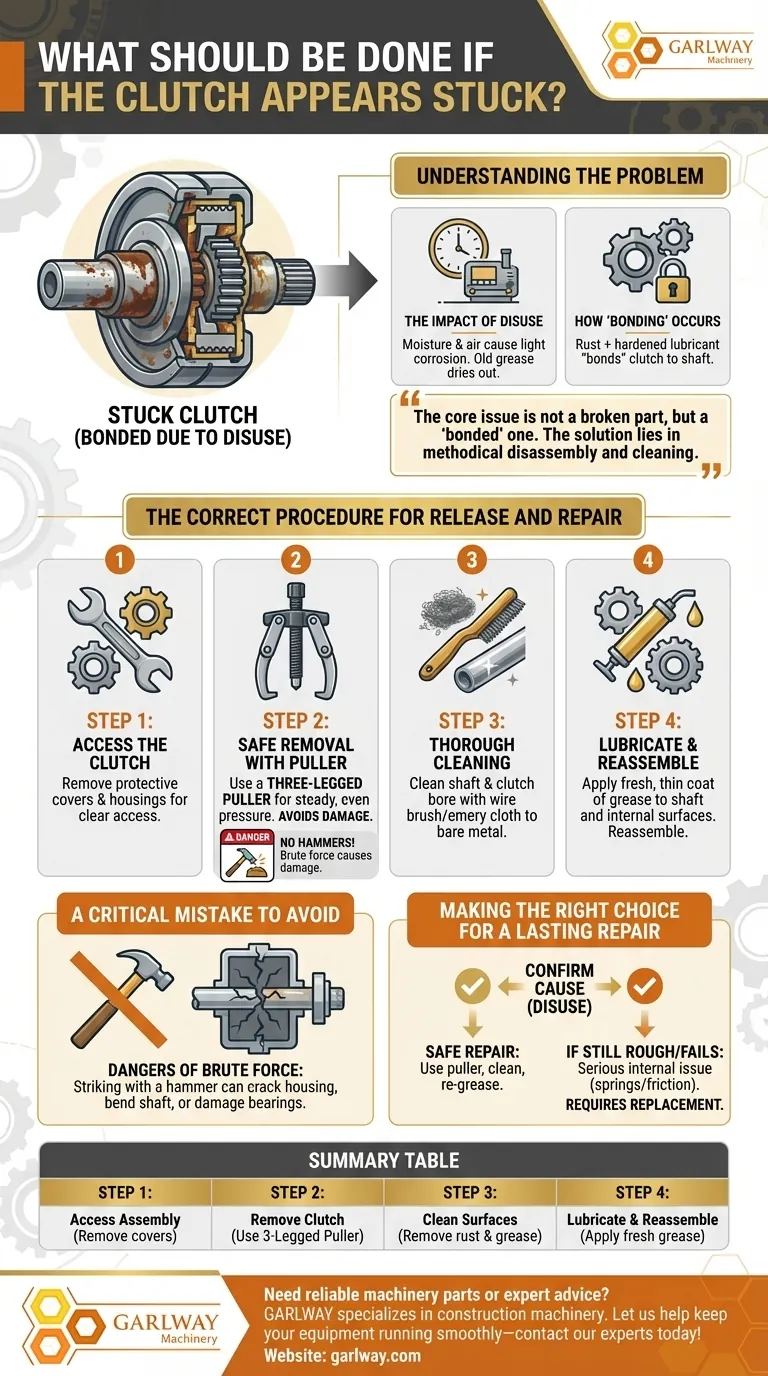
The core issue is not a broken part, but a "bonded" one. The solution lies in methodical disassembly and cleaning, not brute force, to restore the clutch's ability to engage and disengage freely.
Understanding Why a Clutch Gets Stuck
The Impact of Disuse
When equipment sits idle for extended periods, moisture and air can cause light corrosion on the metal surfaces of the clutch and the drive shaft. Old grease can also dry out and harden, acting like glue.
How "Bonding" Occurs
This combination of light rust and hardened lubricant effectively "bonds" the clutch to the shaft. It prevents the clutch from moving as it should, making it feel completely seized or stuck. This is a common issue in seasonal equipment.
The Correct Procedure for Release and Repair
Step 1: Accessing the Clutch
First, you must gain clear access to the clutch assembly. This may involve removing protective covers, housings, or other components that are in the way.
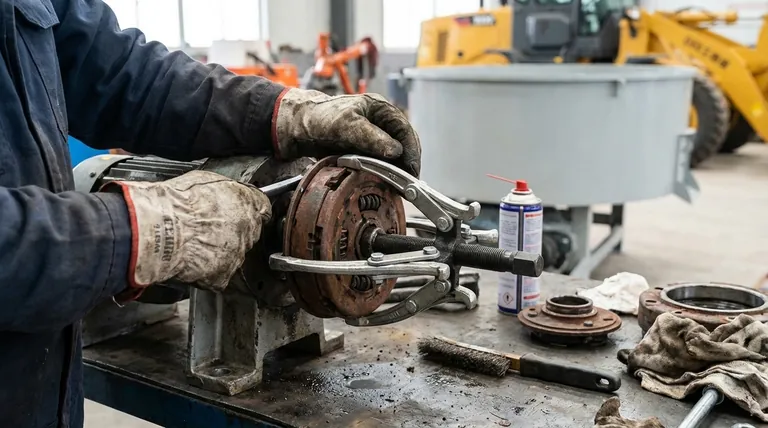
Step 2: Using a Puller for Removal
Forcing a stuck clutch off with a hammer or pry bar can damage the clutch, the shaft, or the engine bearings. The correct tool is a three-legged puller.
This tool applies steady, even pressure to the clutch housing while pushing against the center of the shaft. This allows it to safely pull the bonded clutch off without causing collateral damage.
Step 3: Thorough Cleaning
Once the clutch is removed, carefully inspect the inside bore of the clutch and the surface of the drive shaft.
Use a wire brush or emery cloth to remove all traces of rust and old, hardened grease from both the shaft and the clutch faces. The goal is to return these surfaces to clean, bare metal.
Step 4: Proper Lubrication and Reassembly
Apply a thin, fresh coat of appropriate grease to the shaft and the internal surfaces of the clutch. This provides a lubrication layer that prevents future bonding and ensures smooth operation.
Once lubricated, the clutch should slide back onto the shaft with minimal effort. Reassemble any covers or components you removed earlier.
A Critical Mistake to Avoid
The Dangers of Brute Force
The most common mistake is attempting to knock the clutch loose with a hammer. This rarely works and often leads to much bigger problems.
Applying sharp, uneven impact can crack the clutch housing, bend the engine's output shaft, or damage sensitive internal bearings. Using a puller is the only professional and safe method for removal.
Making the Right Choice for a Lasting Repair
Before you begin, confirm that the clutch is stuck due to disuse, as this procedure is specific to that problem.
- If your primary focus is a safe and effective repair: Use a three-legged puller to remove the clutch, followed by a thorough cleaning and re-greasing of all contact surfaces.
- If the clutch still feels rough or fails to engage after cleaning: This may signal a more serious internal issue, such as worn-out springs or friction material, which would require replacing the clutch unit itself.
Following this methodical process will restore proper function without creating a more expensive problem.
Summary Table:
| Step | Action | Key Tool / Purpose |
|---|---|---|
| 1 | Access the Clutch Assembly | Remove covers/housings for clear access. |
| 2 | Remove the Stuck Clutch | Use a three-legged puller for safe, even pressure. |
| 3 | Clean Contact Surfaces | Remove rust & old grease from shaft and clutch bore. |
| 4 | Lubricate & Reassemble | Apply fresh grease to prevent future bonding. |
Need reliable machinery parts or expert advice? GARLWAY specializes in construction machinery, offering durable winches, concrete mixers, and batching plants for construction companies and contractors globally. Let us help you keep your equipment running smoothly—contact our experts today for support and high-performance solutions!
Visual Guide
Related Products
People Also Ask
- How should a boat trailer winch be properly used? A Step-by-Step Guide for Safe Loading
- What size winch do I need for my boat? Get the Right Capacity for Safe Hauling
- What types of boat trailer winches are available? Choose the Right Winch for Your Boat
- What are the two main types of boat trailer winches? Manual vs. Electric Explained
- What determines the speed and ease of pulling a boat onto a trailer? Master the Winch & Trailer Dynamics
