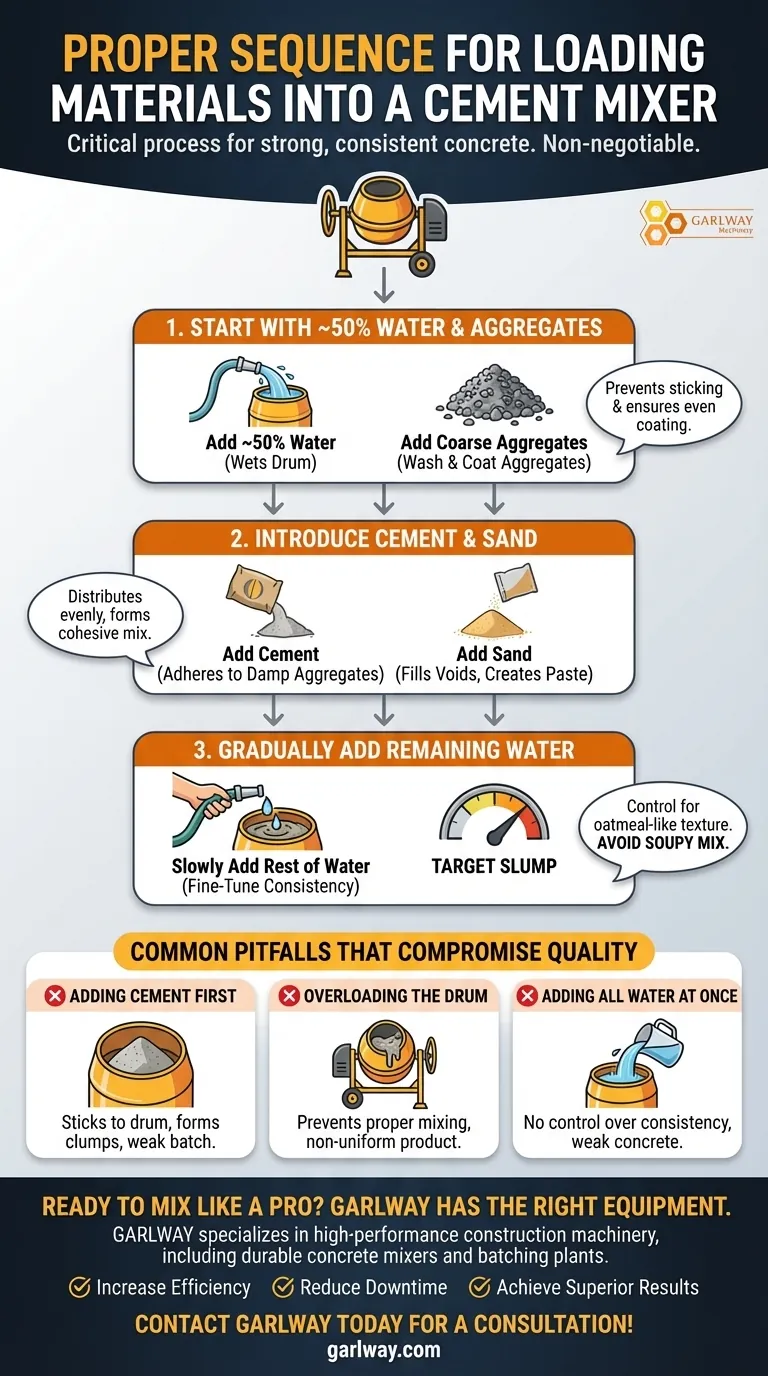
The correct loading sequence for a cement mixer is a critical, non-negotiable process for producing strong and consistent concrete. The most effective and widely accepted method begins with half the required water, followed by the aggregates (gravel), then the cement, then the sand, and finally, the remaining water is added gradually to achieve the desired workability.
The loading sequence isn't arbitrary; it's a deliberate process designed to prevent dry cement from sticking to the drum and to ensure every particle of aggregate is evenly coated with cement paste. This leads to a stronger, more uniform, and higher-quality final product.
The Rationale Behind the Standard Sequence
Understanding the "why" behind each step transforms the task from a simple chore into a controlled process. The goal is to ensure all components are thoroughly and evenly combined.
Step 1: Start with Water and Aggregates
Adding approximately half of your total water to the empty, rotating drum first is the crucial starting point. This initial water wets the inside of the drum and the mixing blades.
This prevents dry cement and sand from sticking to the metal surfaces, which would otherwise create clumps and dry spots that are nearly impossible to mix out later.
Immediately after the water, add your coarse aggregates (gravel or stone). As the drum turns, the aggregates are washed and evenly coated with a thin film of water, preparing them to bond effectively with the cement paste.
Step 2: Introduce the Cement and Sand
With the wet aggregates tumbling, you can now add the cement. The cement will adhere to the damp aggregates rather than the drum, ensuring it gets distributed throughout the mix.
Next, add the sand. The sand helps to fill the voids between the coarser aggregates and ensures the cement is blended smoothly and uniformly, creating a cohesive paste.
Step 3: Add the Remaining Water Gradually
The final step is to slowly add the rest of the water. This is the control phase where you fine-tune the consistency, or "slump," of the concrete.
Adding the water gradually allows you to observe the mix and stop precisely when you reach the target consistency—often described as a thick, oatmeal-like texture. This prevents the common mistake of creating a soupy, weak mix.
Common Pitfalls That Compromise Concrete Quality
Deviating from this sequence can introduce weaknesses into the final product. Being aware of these common errors is essential for avoiding them.
Mistake 1: Adding Cement First
Putting dry cement into an empty mixer is the most common mistake. The fine powder will immediately stick to the drum's interior, forming hardened clumps that resist mixing and result in a weak, inconsistent batch.
Mistake 2: Overloading the Drum
A cement mixer needs free space for the materials to tumble and combine. Overloading the drum prevents proper mixing action, leading to pockets of unmixed ingredients and a non-uniform final product. Always mix in manageable batches.
Mistake 3: Adding All the Water at Once
Dumping all the required water in at the beginning removes your ability to control the final consistency. This often leads to a mix that is too wet, which significantly reduces the ultimate strength of the cured concrete.
Making the Right Choice for Your Goal
Your goal determines how strictly you should adhere to the process. Use these guidelines to ensure your concrete meets the needs of your project.
- If your primary focus is maximum strength and durability: Strictly follow the water-first sequence to ensure the complete and uniform hydration of every cement particle.
- If your primary focus is a smooth, workable finish: Pay close attention to the final, gradual addition of water, stopping as soon as you reach the desired slump to avoid a weak, soupy mix.
Mastering this loading sequence is the difference between simply combining ingredients and engineering durable, reliable concrete.
Summary Table:
| Step | Action | Key Purpose |
|---|---|---|
| 1 | Add ~50% of water | Wet the drum and prevent cement/sand from sticking |
| 2 | Add coarse aggregates (gravel) | Wash and coat aggregates for better bonding |
| 3 | Add cement | Adhere to damp aggregates for even distribution |
| 4 | Add sand | Fill voids and create a cohesive cement paste |
| 5 | Gradually add remaining water | Fine-tune consistency to achieve target workability |
Ready to mix concrete like a pro?
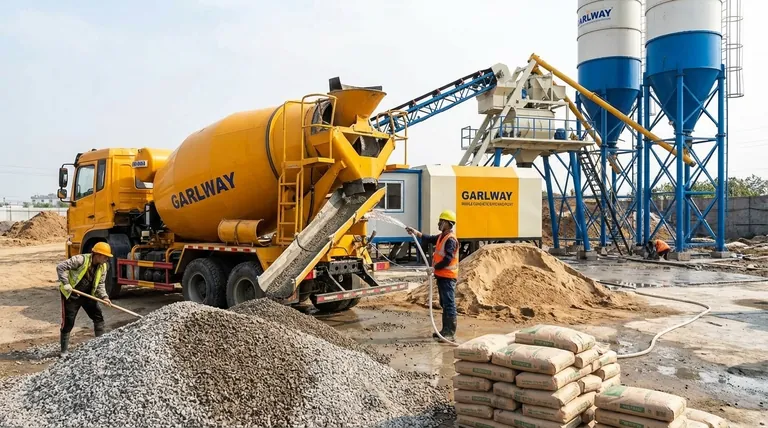
Proper technique is essential, but so is reliable equipment. GARLWAY specializes in high-performance construction machinery, including durable concrete mixers and batching plants designed for contractors and construction companies worldwide.
Let us help you build stronger:
- Increase efficiency with mixers built for consistent, high-quality batches.
- Reduce downtime with robust machinery designed for demanding job sites.
- Achieve superior results by pairing the right technique with the right equipment.
Contact GARLWAY today for a consultation and find the perfect concrete mixer for your project's needs!
Visual Guide
Related Products
- HZS25 Best Cement Mixer for Quick Mix Concrete at Bunnings
- JDC350 Small Cement Concrete Mortar Mixer
- JW1000 Mobile Cement Mixer Concrete Mixer Truck and Batching Plant
- Concrete Cement Mixer Machine Drum Mixer for Construction
- JZC400 Mobile Small Concrete Mixer Cement Mixer Machine
People Also Ask
- How does the mixing process in a cement mixer work? Achieve Perfect Concrete Every Time
- Why is it important to clean the cement mixer after use? Prevent Costly Damage and Ensure Quality Concrete
- How do cement mixers enhance safety on construction sites? Reduce Strain, Hazards, and Accidents
- What distinguishes cement mixers from other drum mixer types? The Key Design for Concrete Strength
- What are the key benefits of using a cement mixer on a construction site? Boost Efficiency, Quality & Safety


